Backpacking Yosemite

For our 30th birthdays, my husband and I wanted an adventure. I may have wanted to prove that just because I was “leaving my 20s”, didn’t mean I was dead (Brant, my husband, honestly couldn’t care less that he was getting older). So we cooked up a little adventure that fit the bill: 31 miles of point-to-point trails at Yosemite National Park over the course of 4 days. We hit the major sites of Half Dome, Clouds Rest, and Cathedral Lakes. We lived out of our packs, hiking serious terrain, camping at unbelievable views, relaxing in the hammocks, and sleeping under the stars. This has definitely been a trip to remember.
I’ll be sharing all the details of our trip with the hope that someone else will take on this adventure as well. You won’t regret it! I’ll go through our trail sequence, what we packed, what we wished we packed, things to know, and park resources.
Buckle up, you’re in for a ride!
WITHIN THIS BLOG
⬇️ Photos
⬇️ Trip details
⬇️ What we packed
⬇️ Tips on prepping for Yosemite
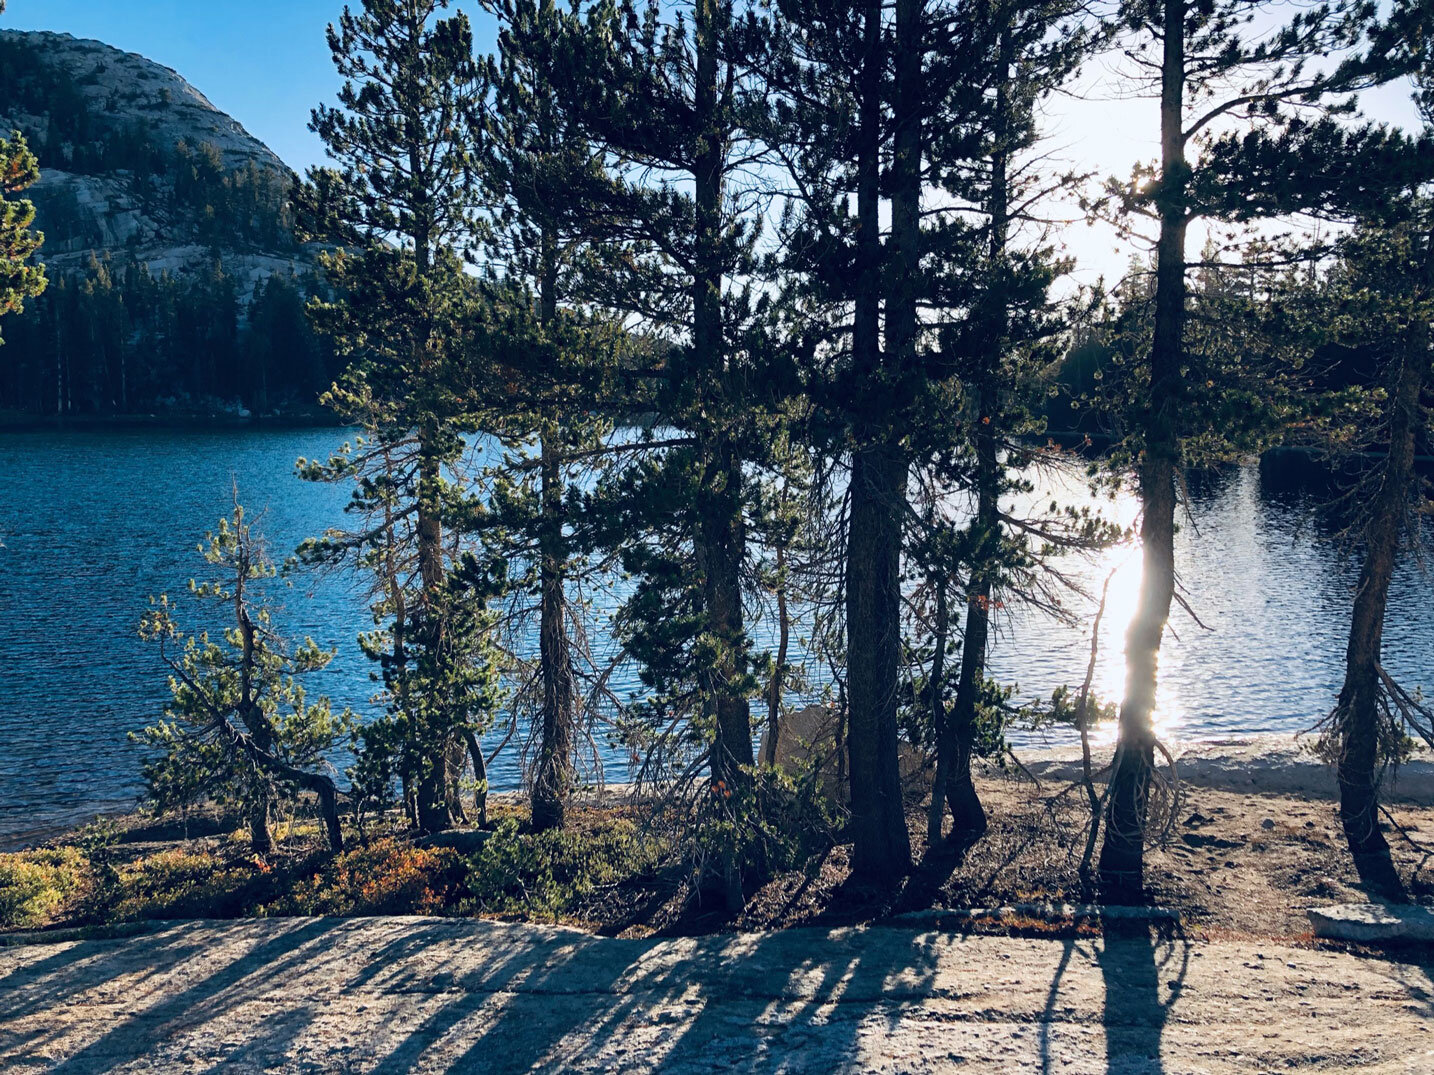
Photos of our trip


Trip details
Trail sequence
31 miles in total
Toulumne Meadows (area) > Cathedral Lakes (entry trailhead) > Cathedral Lakes (we camped here) > Sunrise (passing through) > Clouds Rest (passing through) > Clouds Rest base (we camped here) > Half Dome (the only part that’s not point-to-point) > Half Dome base (we camped here) > Little Yosemite Valley
Trail shown below in pink. It’s a “point-to-point” trail, meaning you park your car at the entry trailhead (top of map), and catch a bus at the exit trailhead (bottom of map) to take you back to your car at the entry trailhead.

Day 1
In the first week of September, we flew to Fresno, California (airport: FAT). Got a rental car from the airport, then drove to our Airbnb in Oakhurts (which was about an hour away), Little white loft. It was halfway between the airport and Yosemite (1 hr from Yosemite). On our way to the Airbnb we stopped by a Sporting goods store to buy fuel. After we arrived to the Airbnb, we went to dinner and relaxed for the evening.
Tip: You’ll need to make time to buy fuel for your jetboil, or whatever you purchased for heating up water (you can’t fly with fuel).


Depending on when you fly in, you can drive to Glacier point (Address: Glacier Point, Glacier Point Rd, Yosemite Valley, CA 95389) where you can have a scenic view of the entire park (1.5 hrs away from the Airbnb, 3 hr round trip). Or you can catch it in the morning before your hike begins.
Day 2
Summary
Saw the entire park at a high point. Drove to the trailhead, got permits and bear canisters. Hiked to campsite at Cathedral lakes.
Details
We drove to Glacier point, then drove to towards our entry trailhead Cathedral Lakes which is in the Tuolumne Meadows area (3 hrs and 40 mins of drive time). Going to Glacier point added an 1hr to our morning trip. Yosemite is actually only an 1hr from the Airbnb (the popular Little Yosemite Valley area), but we had to drive to the north side of it to enter the correct trailhead.

Before we could start our hike, we had to pick up our permit and bear canister for our food. We got these items at the Wilderness centers (there are several throughout the park). There’s one right by the entry trailhead, Tuolumne Meadows Wilderness Center (address: Tuolumne Meadows Wilderness Center, Tuolumne Meadows Lodge Rd, Yosemite National Park, CA 95321). After we got our permit ($35) and 2 bear canisters ($5/canister) for our food and trash, we filled up our water containers at the free potable water station outside the Wilderness center.
Tips: Make sure you have a printed email confirmation for your permit and your Drivers License, otherwise they won’t issue your permit. Cell service is bad out there, don’t count on pulling it up on your phone. For the bear canisters, anything that goes in your mouth or on your body/face goes into the canisters at night so bears can’t get to it. Read about bears and food storage.
There is a little store (like a gas station without gas) that is near this Wilderness center. You can get drinks and food before you start your hike. You should have everything for hike previous to flying to California, but if you forgot anything—now is the time to get it. This is where we picked up some peanut butter packages and wine (not a bottle, it comes in a soft/board-like container).
We entered the Cathedral Lakes trailhead and hiked to the Cathedral lakes to camp, approx 5 mile hike. You can hike about 2-3 miles an hour—the terrain and weight of the packs slows you down compared to generally walking speeds. This was a “short” hike day, but we didn’t start until around 3pm so it was perfect for day 1 on the trail. It was mostly uphill.

Cathredal lakes was by far our favorite spot. Camping there was absolutely gorgeous. The lake was so peaceful and you are mostly isolated. Campers keep their distances. At night the stars were so vivd, because there’s absolutely no light around. You can see the milky way and the constellations. It’s breathtaking. If you have room to pack a hammock—I highly suggest it. This was one of my favorite moments of the trip.


Tips: Refill any water containers before you leave the following day, next water source is Sunrise which you’ll get to halfway through the following day. Btw, fires are prohibited at Cathedral Lakes.
Day 3
Summary
Hiked to the other side of Clouds Rest for a good campsite.
Details
Today was the heavy hiking day, around 14 miles (a mix of up and downhill). Originally, we wanted to average 8 miles a day—which would of been perfect—but due to wanting to camping at Cathedral lakes, 8 miles would put us at the peak of Clouds rest (Fun fact: You can’t camp at the top of Clouds Rest or Half Dome). Hiking from Cathedral lakes to Sunrise lakes was around 5 miles, then from Sunrise to the peak of Clouds Rest was 7-8 miles, then hiking down off the top of Clouds Rest to flat campsite 1-2 miles.


Tip: So if you do this trip—you’re gonna hurt today. If you have room in your pack, bring wine for dinner and some ibuprofen for your inflammation. I don’t even like wine, but let me tell you—I had some that evening and it was glorious. Make sure your refill all your water containers at Sunrise lakes, because you won’t see another water source until the following day after breakfast.
Cloud rest sit at 9,931′ in elevation! The view is great, but Half Dome will blow it out of the water, so take a break—catch your breath and keep going.

The trail passes right by this huge opening, about 1-1.5 miles down from the top of Clouds Rest (image below). Talk about views. So worth the 14 miles. We were completely isolated, not a soul in sight—it was PERFECT. We were too tired to hang our hammock but we should of.


Tip: Download movies to your phone for offline viewing. You can watch a movie at nightfall in the hammock or tent—such a perfect way to end the night. Btw, service at Yosemite is almost non-exsistent. There were a few times I got a bar or two so I could call my kids, but mostly I had zero bars. Sunrise lakes (at the actual lake) had service for a moment. Mostly hiking day 1-3 your service is almost non-exsistant. As you get closer to the valley floor you’ll get more service.
Day 4
Summary
Hiked to a campsite, set up and then ascended to Half Dome. Descend from Half Dome and returned to camp. This is the only “loop” of the trip (where you retrace your steps).
Details
Woke up a little sore today, but we were feeling hopeful because today was an “easy” day. We hiked around 2 miles or so to a junction where there’s a water source (all down hill). Refilled all of our water containers. Hook a right towards Half Dome. We had less than a mile to the base of Half Dome (mostly flat).
Tip: I recommend you finding a camping spot and setting up camp before you ascend Half Dome. This allows you to leave your packs in your tent, yayyyyyy you get to leave the weight behind! Also, you definitely don’t want to bring those packs to the cables (at the top of Half Dome), because if you left it at the base of the cables varmint will eat your straps, food and tear it to nothing. So do yourself a favor, and set up camp. We accidentally camped too close to the junction and the trail which isn’t permitted. Find a campsite that’s away from the junction, and 40 paces away from any trail (refer to the Yosemite website for specific guidance). If possible, pack a “day backpack” so you can still bring 1-2 waters, snacks, and your gloves to the top of Half Dome. Or if you don’t have room in your pack—you can dump the items in your pack, into your tent and only bring what you need (this is what we did). Save your back—DUMP IT.
So at this point, we’ve hiked a few miles. The ascent up to Half Dome was a little under 3 miles up, and 3 miles back down. Today’s total was around 7-8 miles. The coolest part of today was the 40 blocks of cables we climbed at the top of Half Dome (8,839 feet in elevation).

Side note: You must have a special permit for Half Dome to go up in addition to the backpacking permit. There is a full time Ranger at the top of Half Dome checking for permits, bring your ID.

Speaking of the cables, let me dive into that scary-ass ascent. Now for some who aren’t afraid of heights, it’s no big deal. For me—It was hella scary. It’s a 45-60 degree incline where you are pulling yourself up with the cables. I did have a slight panic attack before I ascended, but Brant did a great job calming me down and helped me achieve my goal of making it to the top! I’m so happy he encouraged me to keep going because it was SO WORTH IT! If you are afraid of heights, look directly at the rock wall and do not look up until you’ve reached the top. It worked for me—whoot! It was such a cool experience, it was my second favorite moment of the trip. If you’re able—DO IT!


That evening Brant hung the hammock and went to get water back at the junction from earlier that day, I was resting my knee (it was in terrible pain since day 2). When he got back we had some camping wine and watched a pre-downloaded movie (no service out there) under the stars. It was fabulous. My third favorite moment.
Tip: Bring gloves to increase friction between your hands and the metal cables. The best gloves are the rubber palmed garden gloves. They grip amazing. Leather gloves blow, don’t bring those. Funny fact, a squirrel ate brants gloves the night before. A nice trail hiker gave us their gloves when we were hiking up to Half Dome—thank you stranger! Also, purchasing hiking shoes with a good gip on the soles really make going up the cables easier. Hiking sticks would of helped my knee issue or one of those knee wraps.
Day 5
Summary
Hiked out of the park, returned the bear canister to the Wilderness center, ate real food at a cafe, and hopped on the YARTS bus to get back to the car (entry trailhead in Tuolumne), drove to our hotel/Airbnb, and toke a real shower.
Details
Hiked to the Little Yosemite Valley (via Happy Isels) around 6 miles. This trail iwass basically downhill the entire way with large parts that were flat, so this was an easy hiking day. The last 2 miles were straight downhill, and for my busted right knee—this was actually painful for me. I wished I had walking sticks or knee compression of some sort (Brant was 100% fine, garrrrr).

We passed this beautiful waterfall. I didn’t go swimming due to time (I also didn’t have a swimming suit). Plus my knee was so shot—I couldn’t make the hike down to the water. I did think about jumping in anyways, but I’m so glad I didn’t because I unknowingly still had several miles to go before reaching the bus stop.


The goal was to make sure we got to the Valley floor at least 2 hours before our bus pick-up time (5pm at the Visitors Center).
Tip: The reason I say at least 2 hours, is due to the hella-long hike from the end of the trail to the Visitor center and the few errands you’re going to want to do before the bus. The hike is 1-2 miles (all flat), but due to your exhaustion you won’t want to be in a hurry. The shuttles are down due to COVID, in the future this would likely be a 5-10 min shuttle ride. When the shuttles are in service you may not even need the YARTS bus service.
During the walk, we passed by a cafe that we 100000% wanted to eat at. Not because the food was stellar, but because it was not camping food…and there was cold beer. YUM. We enjoyed a few beers, a salad, a bag of gummy worms, a few pizzas, and a bag of jalapeños chips—it was glorious. GLORIOUS. Additionally, there was this amazing little fire we sat by that really brought the mood full circle. After sitting and relaxing for a few hours, we walked to the Wilderness center to return the bear canisters (it’s a quick drop), and walked to the bus stop. All 3 places were really close together, minimal walking at this point (thank goodness).
Tip: Likely, this the last place for food for the day (depending on where your hotel is that evening) so stock up.
Our YARTS bus was scheduled for a 5pm pick up time, with a drop off at the Tuolumne area around 6:45pm (it was a 1.5 hrs ride back to the car, best part is there’s a bathroom onboard—no more peeing in the woods WHOOP). Due to where we parked, we were going to have to walk a little ways to get to our car. We may or may-not-of bribed the driver into dropping us by our car…all rumors—I will admit to nothing.
Tip: If your fast, you can stop by that little store (where we got the peanut butter and wine) before it closes at 7pm (by the wilderness center). We were literally 1 min late. There are no other stops between that store and our hotel, Wawona hotel (address: Wawona Hotel, 8308 Wawona Rd, Yosemite Valley, CA 95389), which was 2 hours away. Funny story, by the time we got there (9pm) dinner was obvious over and we had no more fuel because we gave it away at the end of the trail (you can’t fly it home). We skipped dinner that night. So, either get to the store before it closes OR don’t give away your fuel and eat camping food one last time.
The hotel was super old, very cool place. We got a room with a shower (yes, there are rooms without showers—trust me pay the extra money and get the shower). There wasn’t air conditioning which was weird, but we flipped the fan on and it was no big deal. We were just happy to take an actual shower and sleep in a bed.
Side note: Due to the bus situation, we were back tracking the buses path to head to the hotel. Essentially you’re retracing your steps to the Valley floor. Irritating but there’s no way around it because of their route times.
Tip: Everywhere around Yosemite books out fast so make sure you have lodging secured before you go on your trip.
Day 6
Breakfast was served at the hotel for an additional cost, it was glorious—I had like 3 plates. The rest of the day was driving and flying. We drove back to the airport to drop off the car rental and fly home. I was so excited to see my babies, I was beyond missing them. They are still the best “sight” I’ve ever seen—yes, even better than Half Dome. Love those babies.

What we packed


Personal clothing
Space was limited, so I needed to be selective on what items I packed. It’s crazy once you start putting things in your bag, what you’ll have to cut. This list is per person although some items can be shared between the group.
Tip: Since you’ll have to check-in the pack (on the flight due to it’s size), you can bring a carry-on with extra clothes for your 1st and last night (when you’re in hotels). You can leave this carry-on in the rented car so you don’t have to carry it across Yosemite. It’s so nice to have those fresh clothes on the last day.
I don’t personally like high-top boots, they rub my ankles raw. Find shoes that fit you, I’ve got super weird feet so I wanted wide flexible shoes with a rock plate. I broke these in for weeks before leaving on our trip.
these are for camp comfort as well as walking/hiking through water, very very useful if you get sores easily
4 pairs undergarments
Darn tough brand, wool. You want a fresh pair each night
Nylon/synthetic is best, not COTTON (you want wicking material). You wear 1 shirt for 2 days…like I said you don’t have room in your pack.
Wicking material is best, not COTTON.
You wear 1 leggings for 2 days. I loved the zipper on the thigh for easy access for phone (to take photos). I thought these were pricy, but I didn’t own leggings that were “wicking” and I knew if I was wearing them for 2 days they needed to have that feature. I loved these! I paired it with a black sports top, layered with the teal short-sleeve shirt, and the long sleeve “fishing shirt”. I could easily peel off layers as it warmed up.
long sleeve for sun protection
Very verstiltile “fishing shirt”, worked great to transition from cooler to warmer weather. I could adjust the sleeves as I hiked as the morning temperature changes (I didn’t have to remove my pack to do this).
I didn’t bring this on the trail and wished I had! I wasn’t expecting it to get that warm but on day 3 it got HOT mid-day. These are a splurge, but they looked so cute with the long sports top I linked above. You could bring any shorts.
Bathing suit
optional, I didn’t have room for this and I never went swimming in the lake. The lake was warm enough to swim though.
We never used ours, but if it had rained—we would of been prepared.
Hat
Sunglasses
long sleeve synthetic or wool shirt – baselayer insulation (midweight)
Anything that a warm fitted long sleeve to wear at night and in the mornings when the temperature drops. I wore this, my shirt, then my jacket in the evenings.
Warm pants
Fleece-lined pants that can go over your leggings when the temperature drops at night. I wore these while I slept the first 2 nights. After that I didn’t need them as we got closer to the valley floor.
lightweight down jacket
My jack had a stuff sack, which was great. I’ve had it forever so I can’t link it. It was rated for 30 degree weather. Lightweight but super warm.
warm hat/band + warm gloves
I wore a simple black ear cover and cheap black gloves, I only used this on the first night when it dropped to 29 degrees. I never used it again. These gloves wouldn’t of been useful for the cables at Half Dome.
Personal Items
Toothbrush and toothpaste (travel size)
Toothpaste can be shared between group
Shared between group (it dries so fast)
A small packet of tissues
Sunscreen
Mineral sunscreen is always preferred
Personal medication (ibuprofen, tylenol, antihistamine)
Ibuprofen helps reduce swelling, which you’ll need for your tired legs. Bring this!
Insect repellant
Optional, when we went we didn’t actually need this
(x2-x4) Hand warmers
I threw 2 of these in my sleeping bag the 1st night (that was the closet night), but didn’t need them again. I packed 8 but only used 2. This trick works great.
Mandatory Gear
I bought mine 10 years ago, this is the closest thing I could find. The one I bought was closer to $100 because it was used. I recommend going to REI to get fitted to see which size and capacity you need. Then you know what type of back suits you. You may be able to find a used one on Facebook Marketplace or Craigslist.
Shared between group. Boil water for your dehydrated meals and coffee—I loved this!!
Great for 2 people, they offer a 1-liter if you’re traveling alone.
This is a must! Great if you need to drink straight from a stream. Probably not as important if you have a filtration system. I’d still have 1/person in case of an emergency.
2-liter hydration pack
This typically comes with your pack, it’s sometimes called a “bladder”. It’s great for drinking while your hiking. Taking off your pack for a water break isn’t ideal.
(x2) 1-liter platypus water bottles
Very versatile. I highly recommend having a total of 4 liters with you to comfortably get between water sources. These bottles shrink as you drink the water—space saver.
Bear canister
Rent from Wilderness center $5. 1 per person.
Headlamp
Brand doesn’t matter, you’ll use it at night to go to the bathroom or set up camp if your running behind. Bring this with you to Half Dome (in your day pack) just in case.
Backpacking permit
Portable changing battery for phones
This was bigger than we liked, but we were worried about not having enough battery life. This device charges from solar panels. We probably could of gotten a smaller option with less battery power.
Extra carabiners
Attach everything on the outside of your bag with one of these, otherwise it will fall out
You’ll need these for the Half Dome cables for friction. Do not skip this item. Leather gloves don’t work well, stick to rubber.
I bought mine 10 years ago, this is the closest thing I could find. It’s pretty much the same.
I bought mine 10 years ago, this is the closest thing I could find. The one I bought was closer to $80.
I know it’s a little big, but it’s soooo comfortable
We used these to hang our pans in the trees to keep varmint away from our packs. One of them completely ate Brant’s gloves for Half Dome.
Anything will do, we used a cheap drawstring bag ($5 from Academy) that we put as a liner into our dry bag (linked). We tossed the cheap bag at the end of the trip.
Doggie bags
Use to collect used toilet paper. Everything you hike in, you must hike out. This makes it easy, vs duct taping the outside of sandwich bags (I’ve been told this before). This makes it easy and not weird/gross. Don’t leave your toilet paper in the park.
1 pack of wetwipes
1pack / person. You can buy single packs at HEB. These are so versatile. Use them for bathing, general clean up, and if things get messy ^.
Additional Items
Lip balm
You’ll hate yourself if you don’t bring something.
Bandana
I didn’t bring one and wished I had because my nose was running. If you have tissues, then you wouldn’t need this.
Money (credit card/debit card/cash)
Driver’s License (Half Dome requirement)
We almost didn’t pack this, but it was one of our favorite experiences. Make room for this!
Shovel for cathode (poop)
We didn’t buy one, you can dig a hole with a stick or rock.
Hiking sticks
I didn’t have these but wished I did. Boy did my knees pay that price. Do yourself a favor and buy a pair.
Food
When you are hiking, you don’t eat a full meal for lunch (it’s more of a snacking situation). Typically you eat a big breakfast, and then snack for lunch and eat a large dinner. We heard this and didn’t listen, so we brought (x4) dehydrated lunches, which we never ended up wanting. You may eat a big lunch vs dinner, so eat how you like! We would of had so much more room for other items if we had listened. Potentially bring an extra meal just in case if you decided not to bring lunch meals. Number are listed per person.
(x3) Dehydrated breakfast
We tried several brands, this brand BY FAR tasted the best. It’s a few dollars more, but so worth it.
(x4) Dehydrated dinner
Again, this brand is the bomb, looks like you can get combos with both breakfast and dinner,
(x6) Peanut butter packages (I loved these!! They are easy to eat while hiking)
(x3) Nut packages
(x3) Jerky packages
(x2) Dehydrated fruit
(x1-x2) Wine
We shared a liter, and wished we brought a little more. It’s so relaxing to have a glass while you swing in your hammock watching the sun go down. Don’t buy a bottle they sell them in a soft shell container.
These were CLUTCH. Don’t deprive yourself of your morning ritual.
A single set would work for 1 couple (1 spoon and 1 fork). You don’t need the knife.
Tips on prepping for Yosemite
Permit
To camp in the park, you must have a permit. Use the Plan your visit: Wilderness permits page on Yosemite’s website to understand the process.
Once you have a permit, it must be picked up in person at a wilderness center in park the day before or day of your trip. They will send out information 2 weeks before your trip start date on how permit issuance will function. When you are applying for a permit, you’ll have the option to also apply for the Half Dome permit (I think you up your chances when you pair Half Dome permit with a backpacking permit).
Tip: You can view the trailhead report to see the availability of permits left (organized by trailhead). Entering through the Tuolumne entry trailhead isn’t as popular as entering through the Little Yosemite Valley floor (generally). Up your chances of getting the permit by applying for a trailhead with more availability (shown on the report). I applied for Tuolumne > Cathedral Lakes trailhead. I entered Sunrise as my 1st night camping spot (even though that’s not where we camped the 1st night). I applied 4 times before getting my permit approved. It’s likely my data entry wasn’t quite right so ensure your entering information correctly. Don’t give up if your first application gets denied.
Water sources
We hiked in 4 liters (per person) of water and used a filtration system to purify lake water each day (different water sources throughout the 4 days). There is no potable water on the trail, make sure you have a filtration system. Life straws won’t be enough, because you need potable water to cook. Make sure you pick up a filtration system. You can view the map for the lakes and rivers available to you on your hike. I’ve noted in the itinerary above on when we hit different water sources. Having 4 liters each per person worked well for us. More water means more weight, but I rather be safe than sorry.


Bears
You must rent a bear canister from a Wilderness center ($5/canister) to store your food and personal items properly. Read about bears and food storage. All items that go in your mouth or on your face/body, goes into the canister. Place the canister away from your tent. Bear mace isn’t allowed in the park. We didn’t have any issues with bears during our stay.
Camping spots
Yosemite has a few rules on where you can camp when you are backpacking. Essentially you may camp anywhere you like, provided you follow all the regulations. Checkout their Wilderness regulations and the FQA section of Wilderness permits . The Wilderness Trailhead Map shows you how far you have to hike in before you camp (from your entry trailhead). There’s a lot of information on their website—it can be overwhelming. You’ve got this!
Logistics for dropping off and picking up
When we went in the first week of September, the shuttles in the park were completely closed. The only available public transportation was the YARTS bus. Due to the available drop off times, I had to rearrange my plan. Originally, I wanted to park my car at the Little Yosemite Valley (exit trailhead) and take a bus to Tuolumne (entry trailhead). The times wouldn’t allow this, so I had to switch it. We parked at Tuolumne (entry trailhead), and then did the 4 day hike and go on the bus at the Little Yosemite Valley (exit trailhead). The bus took us back to our car at Tuolumne (entry trailhead). I didn’t like that there was a potential of us missing the bus, but we had several hours from when we got to the bus stop area and when it departed—it worked out fine. The switch did tact on an additional 3 hrs of drive time which was annoying but worth it.
Weather
Check the weather by trail region it’s crazy how different the weather is depending on where you are in the park.
We took this trip September 1-6th. Temperatures were high of 50s during the day and low of 29s at night (at Yosemite, in the Tuolumne area). Each day as we got closer to the Little Yosemite Valley, the temperatures got warmer.
It’s all about layers. Get a wicking fabric (synthetic) for your short sleeve/tank. Get a long sleeve warm layer for the night time. I note more about this in the “What we packed - personal clothing” section.
Cell service
The cell service in the park was almost nonexistent. I noted a few spots in the itinerary where we picked up 1- 2 bars. Some text messages can get through, but it’s pretty unreliable. Photo images and FaceTime are pretty much not available. It’s helpful if you’ve got a printed map of the area when you’re driving to your hotel on day 5.
General tips
You’re probably going to have to check your packs, ours were way too big for a carry-on. Just accept it, and pay the luggage fee. This will free you up for a carry-on bag of items you can keep in the rental car (so you don’t have to pack it across Yosemite). I suggest packing a clean set of clothes for your fly home. This won’t fit into your pack so the carry-on bag is keeyyyyy.
Cut toenails short, long nails causes problems when you're descending
Look into items to avoid chaffing (males)
Get good wool socks, “Darn tough” brand is the best. They are quick to dry and wool naturally suppresses order unlike synthetics
Blister care
Make sure everything attaches to bag with carabiners
Bring gloves for the Half Dome cables
Bring chapstick (your lips will dry out)
View the list of “What we packed” for more tips